| |
|
Introduction |
Scene 1: TexturingAdding Orange Peel The color of an object varies across its surface. Often an object has texture as well. In this step, you add realistic color and texture to the sphere to create the effect of orange peel. You use the Asset Manager and another essential tool in 3D Studio MAX, the Material Editor.
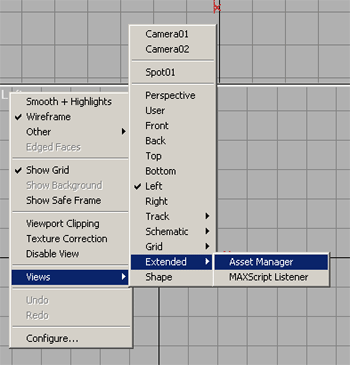
Adding a realistic colorThe Asset Manager lets you locate and apply files of all types, not just MAX files. Here you drag an orange-peel map from the Asset Manager to the sphere. 1. Right-click the viewport label of the Left viewport. From the shortcut menu, choose Views > Extended > Asset Manager.
Fig 01. Asset Manager The Asset Manager replaces the view in the Left viewport. 2. In the Asset Manager, change the filter field from All Geometry to All Files.
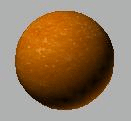
3. Click and drag some texture onto the sphere, then release. The sphere now looks more like an orange.
Fig 02. Sphere look You might notice that the edge is not quite smooth. You can fix this by adjusting the number of segments in the sphere. In general, you use the Modify panel to to adjust an object's parameters.
Fig 03. Modify panel 5. On the Modifiy panel > Parameters rollout, change the Segments parameter to 50. The orange now looks very smooth. The viewport renderer creates a good approximation of the orange, but you should routinely check your work with the production renderer, which shows the true output of the scene. 6. Right-click in the Perspective viewport to make it active. 7. From the Rendering menu select Render. On the Render Scene dialog, click Close + Render. Once rendering is complete, an texturing of the orange is displayed against a black background in the virtual frame buffer (VFB). The surface of the orange is too even. To look real, it needs some bumpiness. 8. Close the VFB window.
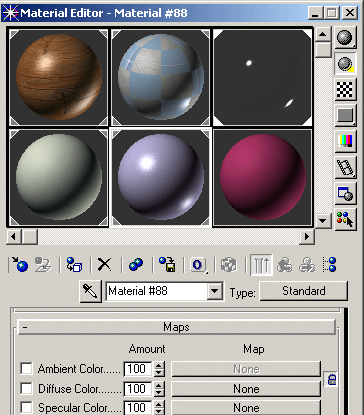
Adding a realistic textureYou use the Material Editor is to define and apply the materials that give objects visual appeal. Here you add the appearance of texture (a bump map) to the orange skin.
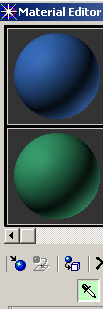
Fig 04. Material Editor 1. On the main toolbar, click Material Editor. If necessary, scroll the toolbar using the middle mouse button. Tip: The keyboard shortcut M opens the Material Editor wherever you are in the program. In the Material Editor dialog, the first sample slot (upper-left) shows a white border around the sphere to show it is the currently active material. The material name for the first slot, Material #1, appears in the list below the samples. You can click any sample slot to make it active; only one slot can be active at a time.
Fig 05. Eyedropper 2. Click the Pick Material From Object button (the "eyedropper") next to the material name. 3. Move the cursor from the Material Editor into the Perspective viewport. The cursor changes to an eyedropper. Move the eyedropper over the orange and click. The first sample slot changes to the map you applied to the orange. Notice that the border of the slot is now a heavy white line with outlined corners. This indicates a hot material, one that is part of the scene. When a hot material is displayed on a selected object in the scene, the corners are solid white.
Fig 06. Corners are solid white When a material is in the scene and in the material editor, but the object is not selected in the scene, the corners are hollow.
Fig 07. Corners are hollow 4. In the material name field, highlight the default name. Type Orange Peel and press ENTER to rename the material. 5. Click the Blinn Basic Parameters rollout to close it. Then click the Maps rollout to open it. Notice that the Diffuse channel, which shows the principal color of an object, is checked. Its Map button lists the map you applied earlier, orangetex.gif. 6. On the Maps rollout, drag the Diffuse map (orangetex.gif) to the Bump channel. The cursor is an arrow with a box attached. Position the arrow over Bump and release. The Copy (Instance) Map dialog is displayed. 7. Click Instance and then OK. The choice of Instance means that if you switched to a different map in the Diffuse channel, the same map would be used in the Bump channel. If you choose Copy, the Bump channel wouldn't update. 8. Set the Amount field for the Bump channel to 100. The minus value indents the lighter areas of the map into the surface, as you'll see when you render. 9. Using the standard Window control at upper right, minimize the Material Editor for later use.
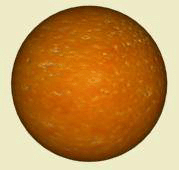
Rendering the resultAs mentioned earlier, it's important to check your work with a production rendering. This time you use a toolbar shortcut. · On the Rendering tab, click Quick Render. This uses the current settings in the Render Scene dialog and begins to render immediately. The keyboard shortcut for this is SHIFT+E. As you can you see, the result is quite a bit different than the smooth, orange sphere with only a Diffuse map applied.
Fig 08. Diffuse map applied 9. When a material is in the scene and in the material editor, but the object is not selected in the scene, the corners are hollow. 10. In the material name field, highlight the default name. Type Orange Peel and press ENTER to rename the material. 11. Click the Blinn Basic Parameters rollout to close it. Then click the Maps rollout to open it. Notice that the Diffuse channel, which shows the principal color of an object, is checked. Its Map button lists the map you applied earlier, orangetex.gif. 12. On the Maps rollout, drag the Diffuse map (orangetex.gif) to the Bump channel. The cursor is an arrow with a box attached. Position the arrow over Bump and release. The Copy (Instance) Map dialog is displayed. 13. Click Instance and then OK. The choice of Instance means that if you switched to a different map in the Diffuse channel, the same map would be used in the Bump channel. If you choose Copy, the Bump channel wouldn't update. 14. Set the Amount field for the Bump channel to 100. The minus value indents the lighter areas of the map into the surface, as you'll see when you render. 15. Using the standard Window control at upper right, minimize the Material Editor for later use.
Alternative way to create the texturing effectLets take a look at the alternative way to create the texturing effect. In the texture part we are dealing with the different texture marks for our surfaces there are a number of textures offered in the program itself. Go to the tools, then menu, and choose material editor, for texturing the objects that we have just created. The following window should appear on the monitor.
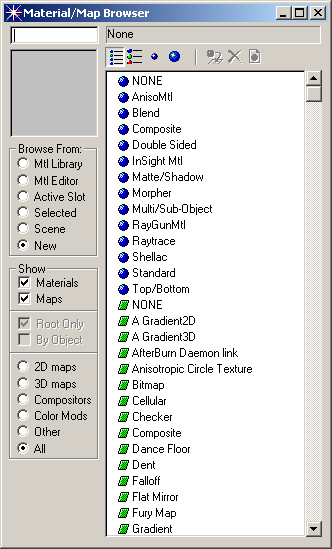
Fig 09. Material Editor Material map browser is another significant feature in MAX, it allows one to preview all textures available in the program.
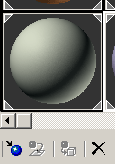
Fig 10. material/map browser In our case we have chosen a wooden surface for the table surface and the tiles for walls for ceiling an the floor there are concrete surfaces applied. To add a texture to whatever surface we have first to select this surface and then either drag and drop it on our model or add it by pressing the get material button.
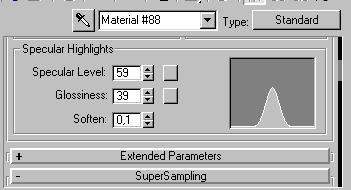
Fig 11. get material button There are a number of ways how the texture can be edited to reflect the light for example from the Blinn Basic Parameters as is seen from the picture below.
Fig 12. Blinn Basic Parameters Also when placing whatever texture we have to take into account how it will be directed there are for example wood textures that are most wisely are added in the parallel to the surface direction. The reflection of the light from the surface of the texture is quite important and can be a whole-complicated technique when we are talking about the glass for example. Then we are moving to the significance of the size of the texture sample itself. Certainly it does not make sense to add an enormously big tile to the wall but it must be properly scaled instead |
|
| |
