| |
|
Introduction |
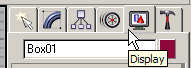
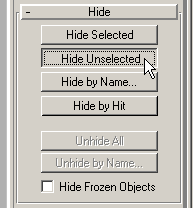
Day Two: TexturingNow we will texture the cover of the table. All other object are unnessasary for this task so a good thing would be to hide them. Select cover, go to the Display panel and press Hide Unselected button. Only cover will stay on the screen.
Fig 01. Display Tab
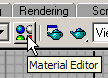
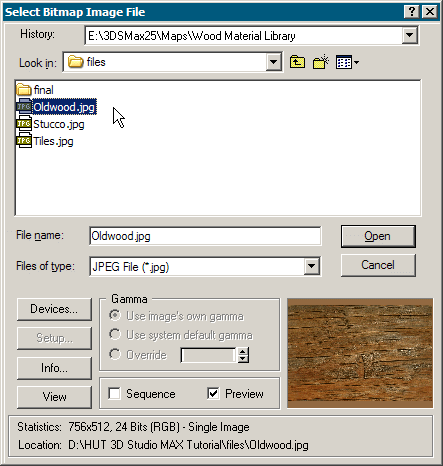
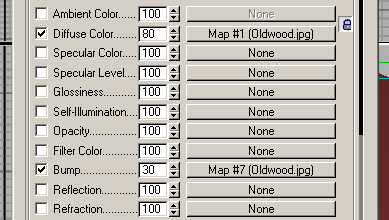
Fig 02. Display Tab/Hide Unselected All materials are created and edited in Material Editor. Open Material Editor and select free material slot to start-up a new material. Place Oldwood.jpg into Diffuse Color slot.
Fig 03. Material Editor
Fig 04. "Diffuse Map" Slot
Fig 05. "Bitmap" Map Type
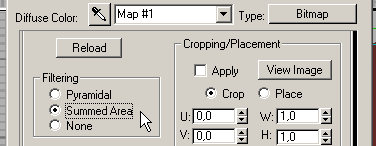
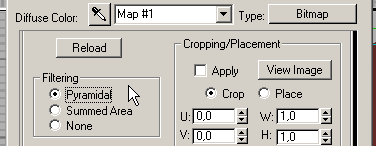
Fig 06. Select Bitmap Image File The diffuse color is the color that the object reflects when illuminated by direct daylight or artificial light that makes the object easy to see. In properties choose Summed Area in Filtering panel.
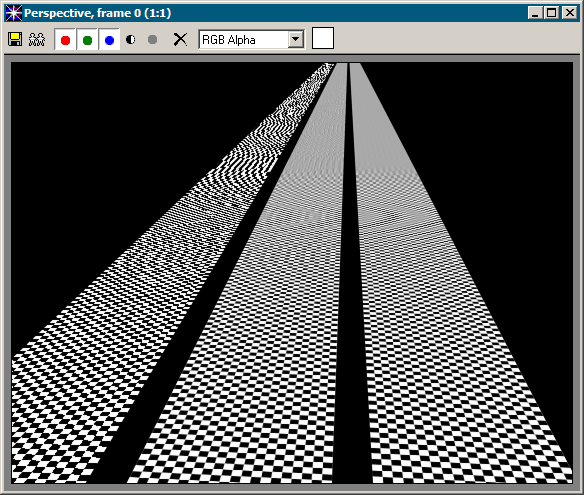
Fig 07. "Summed Area" Filtering Type Filtering is a technique of antialiasing the bitmaps during the rendering. As a result bitmaps will look smooth when looked under angle without any jadges. Summed Area gives usually better results than Pyramidal, without filtering especially textures with regular pattern look ugly, you can turn filtering off for test rendering, because any Filtering slows down computer.
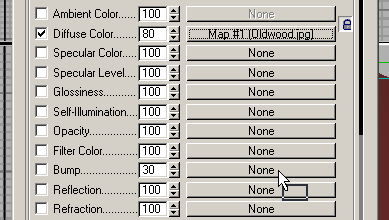
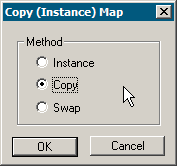
Fig 08. "None", "Pyramidal" and "Summed Area" Filtering Types Download an example file to see how different filtering options affect result. Drag Diffuse Color slot to the Bump slot. Bump mapping makes an object appear to have a bumpy or irregular surface. During rendering lighter areas of the Bump map appear to be raised and darker areas appear to be low. Bump is the simplest way to add subtle details to the object.
Fig 09. Copy Map
Fig 10. Copy Method You can set Filtering of the Bump map to Pyramidal, because filtering of this kind of map is not so important.
Fig 11. Bump
Fig 12. "Pyramidal" Filtering
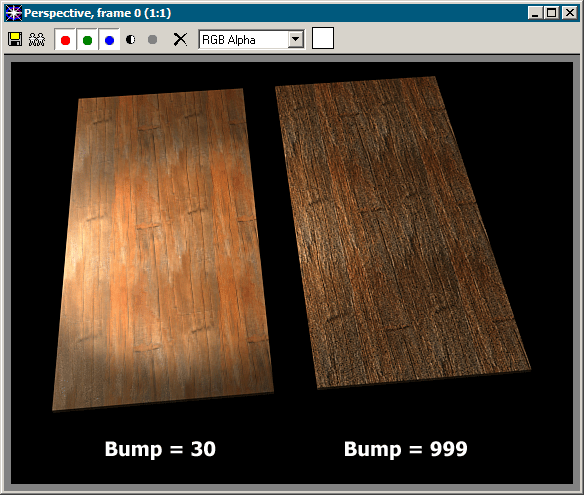
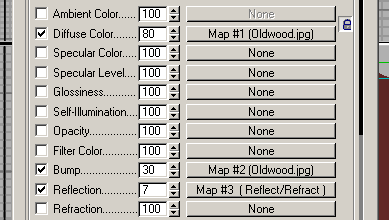
Fig 13. Bump Effect To play with Bump options download an example file. If you want a polished cover of table you can add Reflect/Refract map to the Reflection slot using default options.
Fig 14. Reflect/Refract Map Select cover of the table and assign material to it.
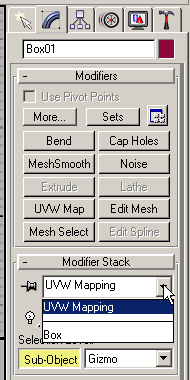
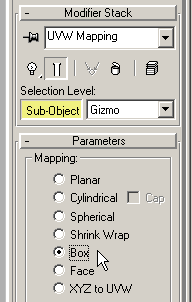
Fig 15. Assign Material to Selection Now we need to tell MAX how to place this material on object. Apply UVW Mapping modifier to the box. Activate Sub-Object regime.
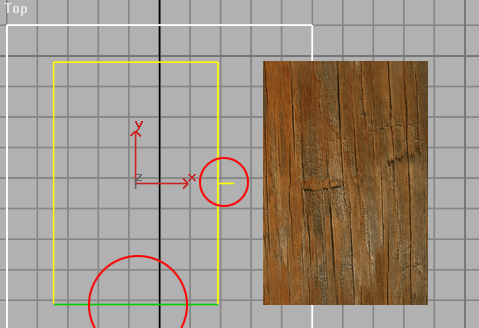
Fig 16. UVW Mapping Lets take a closer look at the Gismo which looks like a frame. Little yellow protrusion indicates the top of the mapping and green line indicates the right side of the mapping. Picture below illustrates how images will be placed on object using this mapping.
Fig 17. Gismo
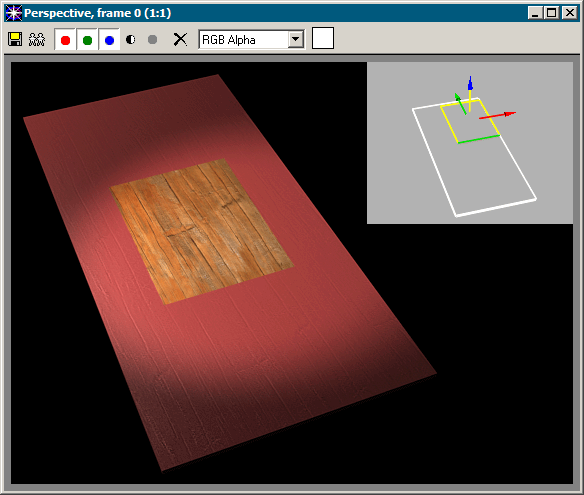
Fig 18. Map on Object As you can see mapping frame took form of the table. First problem is that planks usually go along the table not across it.
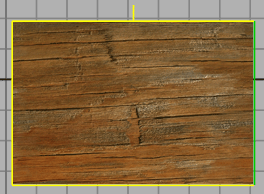
Fig 19. Mapping Placement by Default To fix this problem rotate Gizmo clockwise 180 degrees.
Fig 20. Rotate Tool
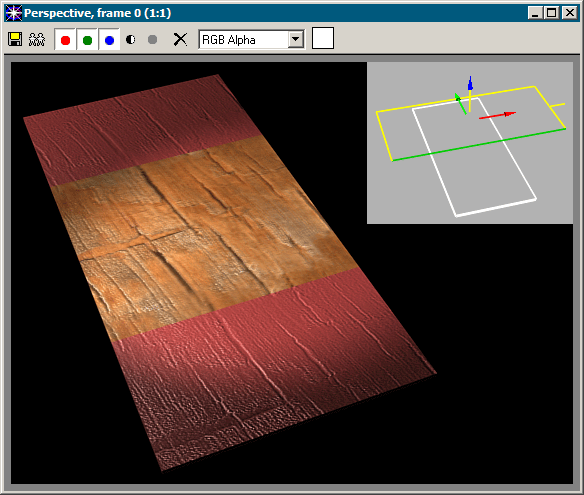
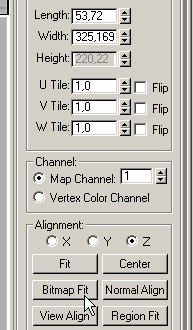
Fig 21. Rotated Mapping Second problem is that mapping form doesn't match texture proportions. As a result texture looks distorted. Type length of the mapping 53.72 cm and then press Bitmap Fit button. Length of the mapping will stay the same, but Width will change to match proportions of the texture.
Fig 22. Changing Size of the Mapping
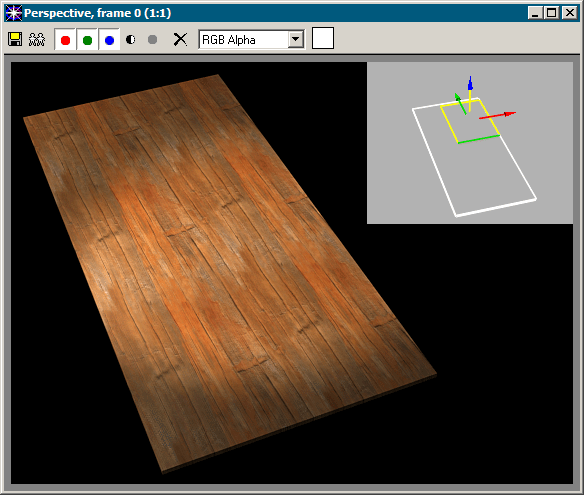
Fig 23. Final Mapping with One Tile
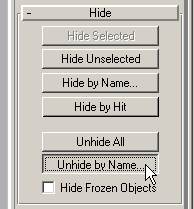
Fig 24. Final Mapping To become familiar with all different kinds of mapping download an example file. Now unhide legs and frame of the table.
Fig 25. Display Tab
Fig 26. Display Tab/Unhide by Name... Apply mapping to them the way described above. The only difference is that this time Box mapping type will do a better job.
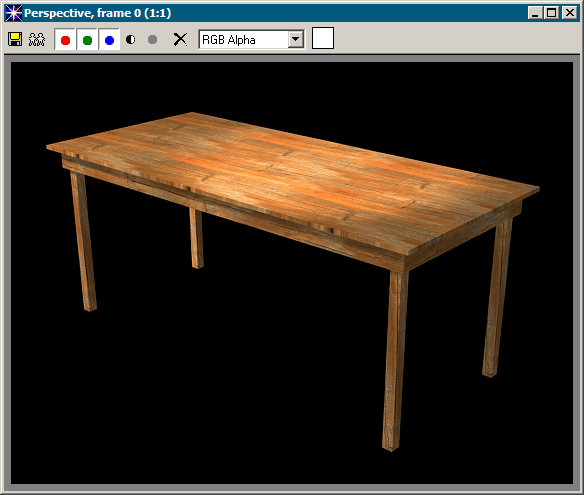
Fig 27. Box Type of a Mapping Finished table will look like this.
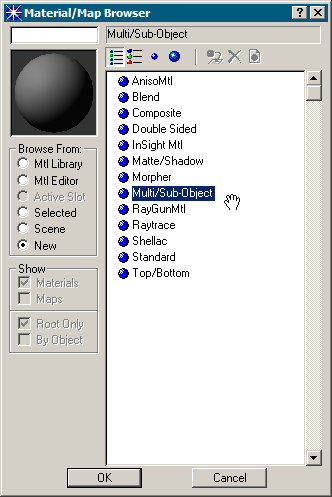
Fig 28. Finished Table Next thing to texture is our room. Hide all objects and unhide box that represents room. Go straight to the Material Editor. Select free material slot and change material type from Standart to Multi/Sub-Object.
Fig 29. Material Type
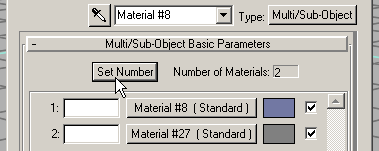
Fig 30. Multi/Sub-Object Multi/Sub-Object material combines several materials in the one. It's the way to apply several materials to one object. We need material for walls and for floor so number of materials in Multi/Sub-Object will be 2. Set it.
Fig 31. Set Number of Materials in Multi/Sub-Object Go into first material slot and setup it for walls.
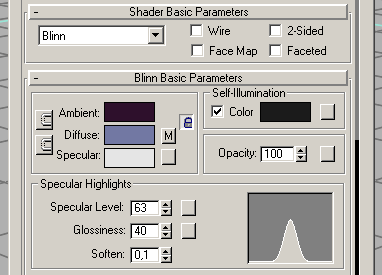
Fig 32. Walls Material Basic Parameters
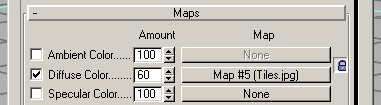
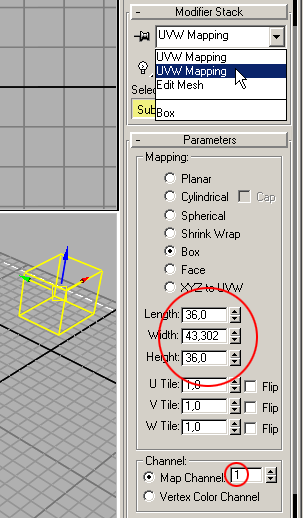
Fig 33. Diffuse Map In the Tiles.jpg map parameters set its Map Channel number to 1. From now on UVW Mapping with channel number 1 will define how this bitmap will be placed on the object.
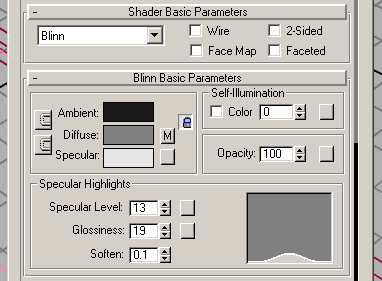
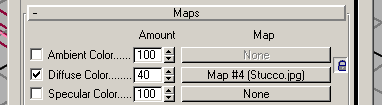
Fig 34. Map Channel Construct floor material. In the Stucco.jpg map parameters set its Map Channel number to 2. UVW Mapping with channel number 2 will define how this bitmap will be placed on the object.
Fig 35. Map Channel
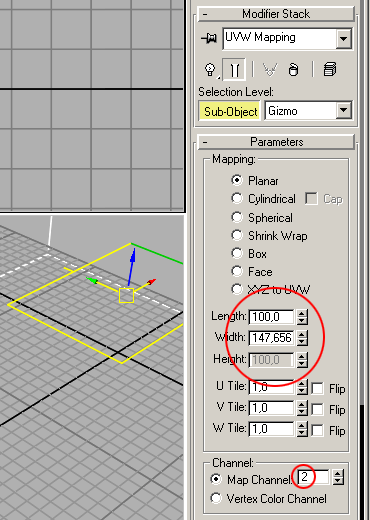
Fig 36. Map Channel Assign two UVW Mapping modifiers to the room and set mapping types and channels as well.
Fig 38. First UVW Mapping
Fig 39. Second UVW Mapping Select room and apply material to the selection.
Fig 40. Assign Material to Selection |
|
| |