| |
|
Introduction |
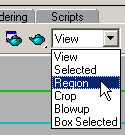
Day Two: RenderingRendering is very flexible in MAX. You can disable all unnecessary options like anti-aliasing, filtering, reflections and so on during test renders. It's also possible to render only certain parts of the viewport, render only selected objects or blowup part of he viewport to the whole screen.
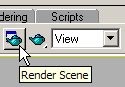
Fig 01. Render Options Press Render Scene button. Render Scene window will open.
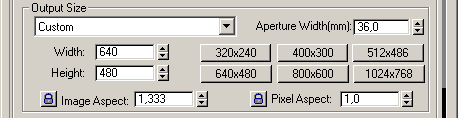
Fig 02. Render Scene Press 640x480 button. This will make MAX to render 640x480 images.
Fig 03. Output Size Custom You can choose a plenty of other resolutions as well. MAX has lots of presets.
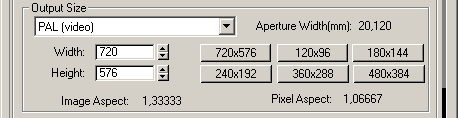
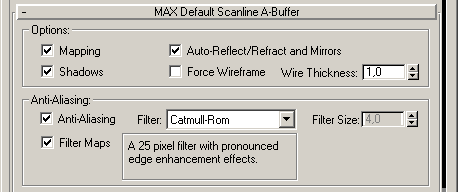
Fig 04. Output Size PAL During final rendering all this options must be turned on. Test renders are not so importart. Disabling these options will speed up render a couple of times.
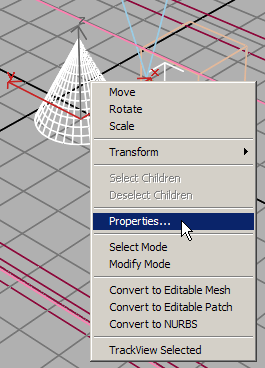
Fig 05. Render Options It's time to descuss some special effects that can be applied to the scene. I want to apply Glow effect to the cone. Select cone, right-click on it and select Properties... from the menu.
Fig 06. Object Properties MAX has object channels. By default every object has 0th channel. If we want to apply Glow effect to cone we need to let MAX know that only cone must be affected. We will make cone to have object channel 2 and later apply Glow effect to all objects that have channel 2. Type 2 to the Object Channel field.
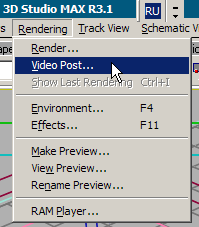
Fig 07. Object Channel Video Post is a build-in composer.
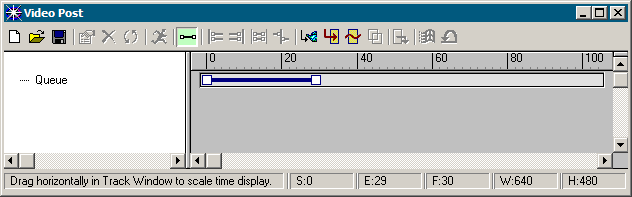
Fig 08. Video Post... By default it's empty.
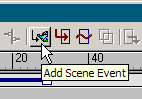
Fig 09. Video Post Add Camera02 by pressing Add Scene Event.
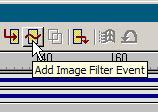
Fig 10. Add Scene Event Add Lens Effects Glow effect by pressing Add Image Filter Event.
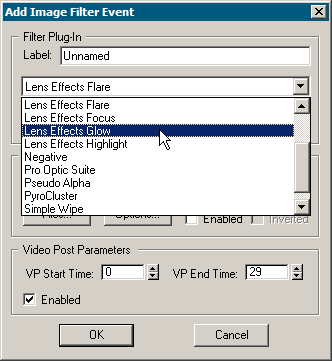
Fig 11. Add Image Filter Event
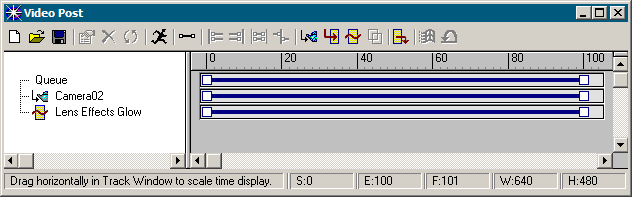
Fig 12. Lens Effects Glow Video Post will render view from the Camera02 and then add Lens Effects Glow effect to the image.
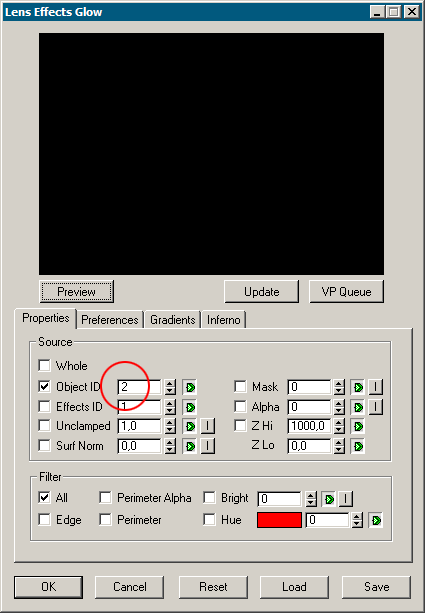
Fig 13. Video Post Double-click on Lens Effects Glow event to fine tune it. Type 2 into Object ID field. This will make effect to affect only objects with Object Channel 2.
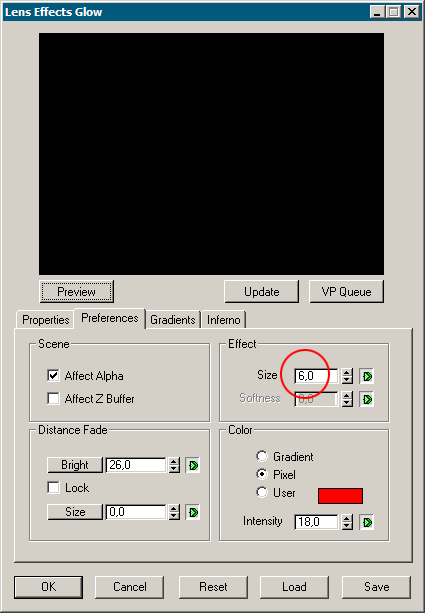
Fig 14. Lens Effects Glow Properties Size of the Glow will be 6 pixels.
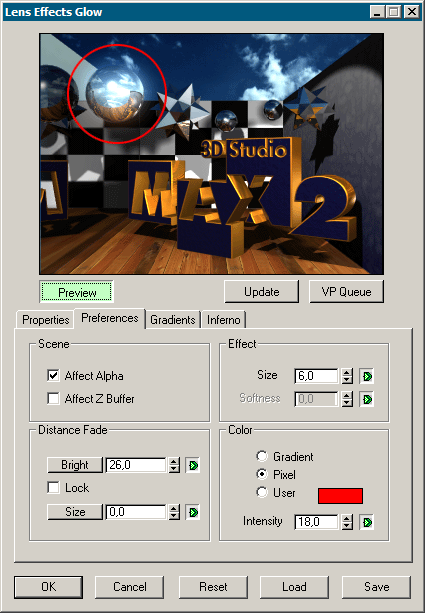
Fig 15. Lens Effects Glow Preferences Press Preview button to interactively see how effect will look like.
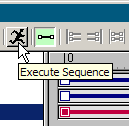
Fig 16. Lens Effects Glow Preview Press Execute Sequence button in the Video Post to see the result.
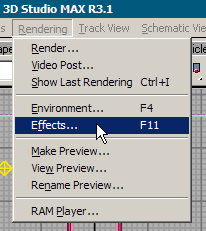
Fig 17. Lens Effects Glow Preview Video Post is not the only place to add special effect to the scene. There are two other places that called Environment... and Effects... Environmental effects are used to add atmosphere effects like Combustion, Fog, Volumetric Light, etc. Effects... is reserved for more conventional effects like Film Grain, Blur, Lens Flare, etc. We will familiarize ourselves with Effects...
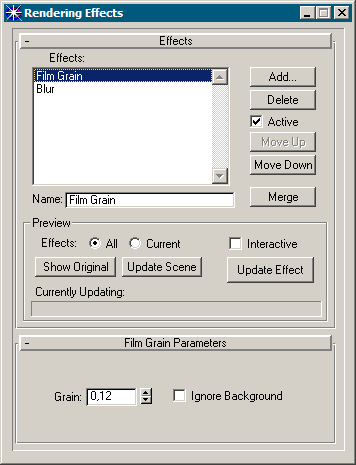
Fig 18. Effects... Add Blur and Film Grain effect to the list.
Fig 19. Film Grain Blur will soften the most bright parts of the picture. Film Grain will add noise to the picture. Combined these effects will make image to look more live, less computer-generated.
Fig 20. Blur Type
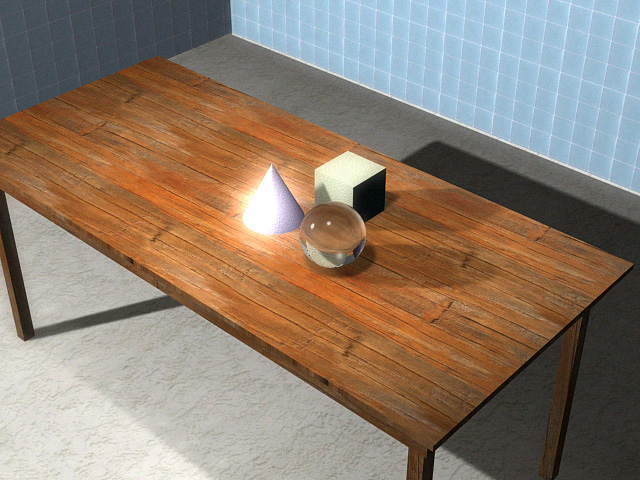
Fig 21. Blur Pixel Selections Go back to the Video Post and press Execute Sequence button. All three effects (Blur, Film Grain, Glow) will add up to the realism of the picture. Tutorial is finished.
Fig 22. Final Picture Scene can be improved still. I think that Glow effect is too pronounced, maybe you should make it the size of 4 pixels instead of 6. There is a problem with the sphere. Its shadow is as dark as cube's shadow. Sphere is transparent and naturally can't have such a dark shadow. The whole scene is too clean despite of Film Grain and Blur effects. You need to populate scene with more objects and add some dirt to all surfaces. Lighting and composition could be better. Objects have too sharp edges. Floor is unnaturally even. You can see 3x3 tile structure on the wall texture. And so on... Download finished project. |
|
| |